How to Photograph Your Restaurant & Food Like a Pro, With Photographer, Michael Cavotta
You’re in for a real treat today. We invited professional photographer, Michael Cavotta, to shed some light on what it takes to produce professional-quality photos for your restaurant — even if you’re on a budget.
Michael Cavotta is an award-winning editorial food and commercial headshot photographer in Cleveland, OH. He is available for assignments worldwide. You can find him on the web at michaelcavotta.com or email him at mcavotta@mac.com.
Can you give us a brief intro about who you are, what you do, and where (location) you and your clients are?
These days, I’m a commercial headshot photographer, but I cut my teeth shooting editorial food—that is, real food typically shot in the environment in which it’s served. My clients include local magazines including Cleveland Magazine, Ohio Magazine, and Lake Erie Living—as well as national titles like Culture: The Word on Cheese.
What led you to focus on photography for Restaurants and hospitality clients?
Chance, actually. A friend was the editor of a lifestyle magazine here in Cleveland called Smart Health and asked if I wanted to get paid to take pictures. I was new to photography and had only recently bought my first digital SLR camera. I figured it could be a way to pay for my new hobby, never dreaming it would lead to a complete career reboot as a professional photographer 5 years later.
For those who are on a budget and don’t want to hire a professional photographer, what equipment would you suggest they use to produce their photos?
The truth is, you can take decent food photos with an iPhone—if you know what you’re doing. That said, with the cost of consumer dSLR cameras coming down and the power of point & shoot cameras on the rise, here’s what I’d look for at a minimum:
Use a Tripod
Unless you’ve got great, flat light to work with, you will need to use a low ISO and slow the shutter down and a tripod will increase the odds of getting a clean shot.
Avoid Direct Sunlight
Daylight is the best light for shooting food, but direct sunlight makes for hard shadows.
Leave Something to The Imagination
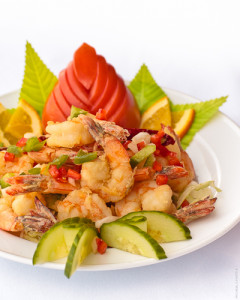
You don’t have to show everything. Don’t be afraid to get up close & personal with a plate. Texture can often make an otherwise crummy looking subject like onion rings look AMAZING.
“Leave something to the imagination. You don’t have to show everything.”
 Any tips for preparing a restaurant to be photographed?
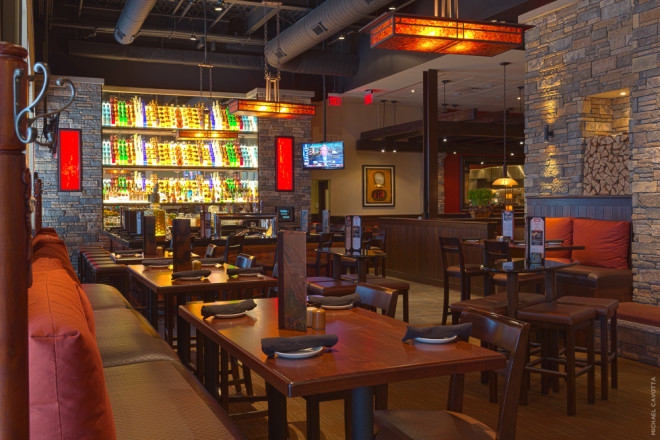
Turn every light in the house on full-blast. Generally speaking, more light = less noise in digital photography. It’s easier to underexpose the scene a little bit to get the mood right than it is to “push” it and introduce detail-robbing noise into your shots.
How about tips for preparing food to be photographed?
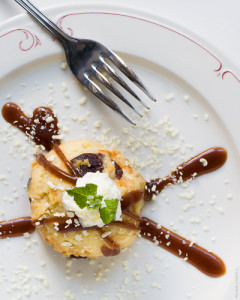
This one’s not too tough. If it looks good to your eyes, it can look good for the camera. Notable exceptions are the aforementioned beef entrees, that tend to shoot better undercooked. In terms of plating, I think elevation makes for far more appealing images than the alternative. When shooting a flat plate, don’t be afraid to go bird’s eye on it and shoot straight down, even cutting off half or more of the plate when the dish is more or less homogenous.
 After the photos are shot, what can be done to enhance and prepare them for final presentation on their website or in print materials?
Photoshop is your friend. Learn it’s ways or find someone who already knows them. There’s so much that could be said here, but in general, you want to make sure that you’re working on a color calibrated monitor so you can be sure the green beans you see on your screen won’t look blue on someone else’s. All images require some degree of sharpening to look crisp and draw people in, but resist the temptation to over-sharpen your shots.
Without being deceptive, can you suggest any “tips or tricks” to make Restaurant and food photos more attractive to potential customers?
Tricks? I think Photoshop offers virtually limitless potential for the ethical enhancement of food and restaurant photography. But the best tip I can offer is this: Never—and I mean NEVER—use the flash on your camera to take a picture of food or the place in which it is served. Unless you really know what you’re doing, it’s a sure-fire way to tell the world “I thought I could get away without hiring a photographer and failed miserably.” For what it’s worth, every shot in my food portfolio—including the ones that landed me a Cleveland Press Club Award—were taken exclusively with available light. So you can do it too!
 What is your process when working with a Restaurant client? Take us through a typical project.
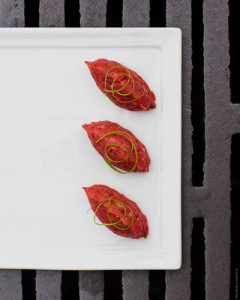
When I’m given an assignment, I make sure to ask about the location and the lighting. Are there windows? What time of day do they get the best light? Hopefully, that overlaps with a time just before or after their lunch rush, when the place is setup right and properly staffed. My process is deceivingly simple. It’s just me, my camera (Canon 5D Mark III), and a tripod. You never really know what you’re going to have to work with until the plate is in hand and you see what the location/lighting have to offer. Things don’t always come easy. It’s in those moments where you have to be willing to experiment. I’ve shot food in bathrooms, on sidewalks, even on a sewer grate (no joke). In the end, I let my stomach lead my eye to a perspective where the food looks most appealing, without losing touch with its associated brand/environment.

Leave a Reply